This past summer I set up a little 6-dollar-a-month Ditigal Ocean linux server to run crons jobs for different coding projects like my Plug-N-Play Twitter Engager and some stock analyzer scripts. It was a pretty barebones server instance so it took a bit of work to get into production-ready state. I've tried to compile the steps here so others (and future me) can reference it for a quicker setup. ?
First, on my local mac terminal shell I create a new public and private ssh key pair, naming it "crontastic-key":

ssh-keygen
When running this I get the output suggesting a file name:
Generating public/private rsa key pair.
Enter file in which to save the key (/Users/jlynch/.ssh/id_rsa):
Generating public/private rsa key pair.
Enter file in which to save the key (/Users/jlynch/.ssh/id_rsa):
Remember to include the full path (you probably want to save it in your .ssh folder), changing it to the name you will use for this server.
For example:
For example:
/Users/jlynch/.ssh/crontastic_key
/Users/jlynch/.ssh/crontastic_key
After this you should see two files (one with a .pub extension) when listing the contents of the .ssh folder.
ls ~/.ssh/
Great, now let's take the contents of the public key and put that in BOTH the digital ocean and github.
new ssh key section (when creating the droplet, click new SSH key
new ssh key section (when creating the droplet, click new SSH key
First, print out the contents of your .pub file and copy it to the clipboard with your mouse
cat /Users/jlynch/.ssh/crontastic-key.pub
Depending on your system, you could also use the pbcopy command to copy it to the clipboard:
pbcopy < ~/.ssh/id_rsa.pub
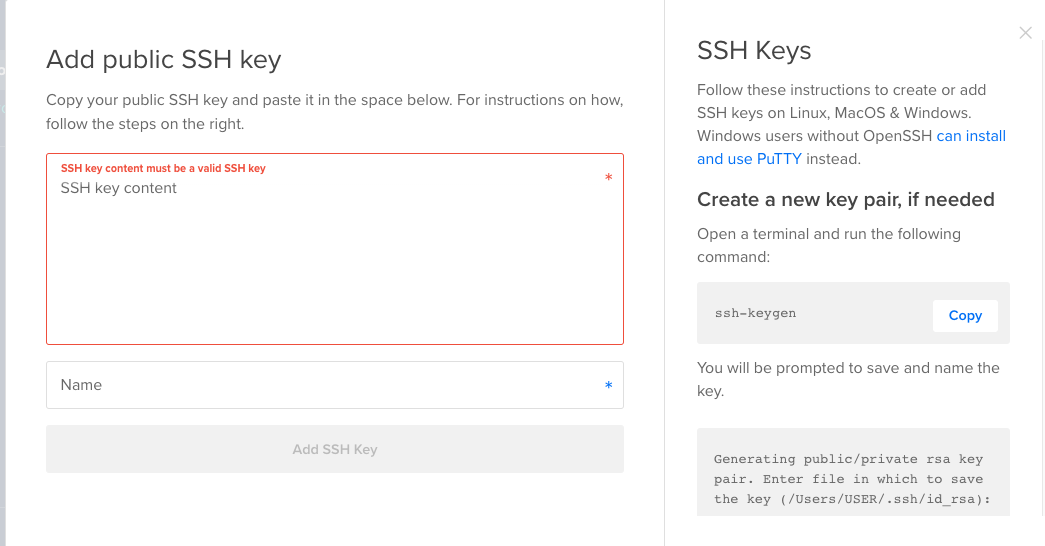
Then in digital Ocean when creating the droplet, click the "New SSH Key" button, and add paste the public key into the SSH key content field.
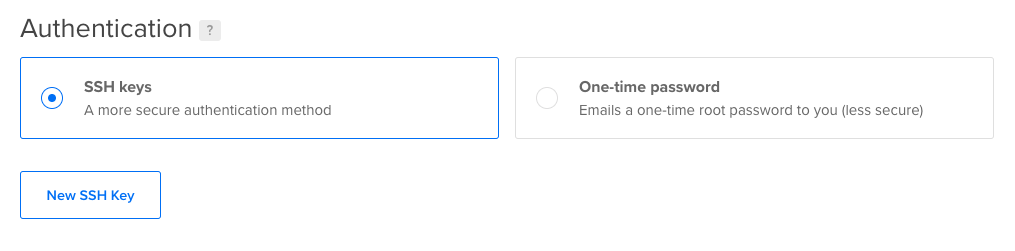
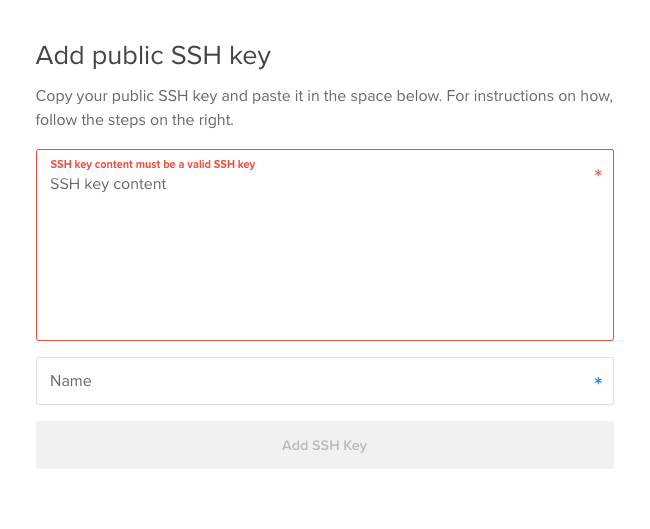
Then paste the public key, name it "Crontastic", and click Add SSH Key, and finish creating the the server on Digital Ocean. When done, click the "create droplet" button. Let's jump over and add the ssh key into Github as well. Then when we come back the server should be ready and have an assigned ip address we can use to connect to it
Setup Github SSH Key
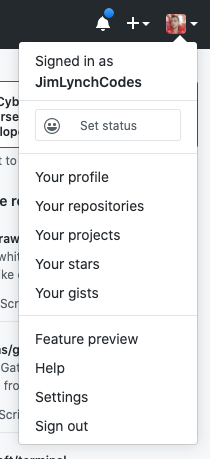
Now jump over to Github, and go to your account settings page:
Go to the SSH and GPG keys section and paste the public key in here:
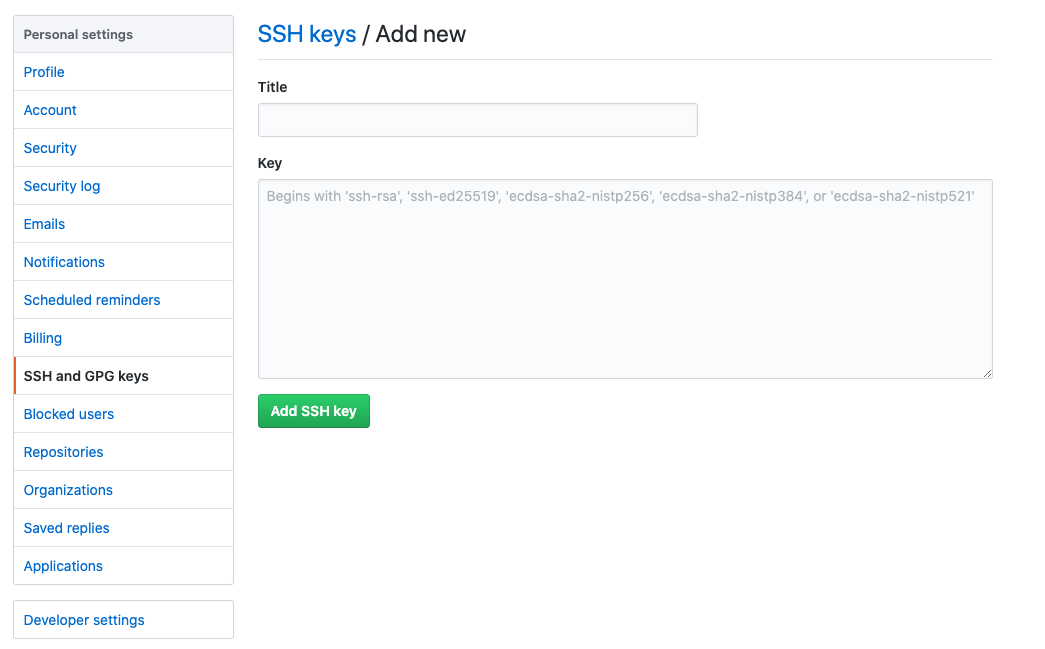
At a place I worked on time I was told that using SSH cloning is preferred over HTTPS for security reasons, and I never set my account back to allow HTTPS. hehe.
Tunneling Into The Server
Now back in the local shell you'll notice that even though we created this new key pair, we haven't "added it to our keychain" yet. You can run ssh-add with the -l flag to show your added keys.
ssh-add -l
You can then call ssh-add pointing at the private key of the same keypair you added to Digital Ocean and Github.
ssh-add ~/.ssh/crontastic-key
Now you should have one more key in your chain when you run ssh-add with the -l flag again.
If that's the case then you should be able to tunnel into the server as root (Digital Ocean doesn't seem to provide a user other than root, so the next few steps here will be about creating another user).
Adding A New User
Since we don't want to use the root user for everything we'll want to setup a new user. It's common when using ubuntu to name this user ubuntu, so I'll do that here.
adduser ubuntu
enter a password if you'd like (I recommend using the ssh key password so it's not super confusing) and just hit enter to the user information questions. Then give this user ability to use the "sudo" command when necessary.
usermod -aG sudo ubuntu
Now, we'll want to copy these specific ssh key files so that so can ssh into the server as this new user. First, create a .ssh folder in the user's root directory:
mkdir /home/ubuntu/.ssh
Then copy root's authorized_keys file into the new user's .ssh folder:
cp .ssh/authorized_keys /home/ubuntu/.ssh/
So now the authorized keys, files are in the right place, but if we run ls with the -al flags then we can see that we don't have the proper permissions. Since we want to treat these as ubuntu's keys then ubuntu should probably have ownership of them. Also, the -rw------- permissions settings will most likely cause problems when using it with git.
Let's first change ownership to ubuntu:
chown ubuntu.ubuntu /home/ubuntu/.ssh/authorized_keys
Then we'll use chmod 644 to change it to the desired permissions: -rw-r--r--
chmod 644 /home/ubuntu/.ssh/authorized_keys
New Key Way
sudo ssh-keygen
sudo chown ubuntu.ubuntu /home/ubuntu/.ssh/crontastic_gh /home/ubuntu/.ssh/crontastic_gh.pub
Enable UFW Firewall
This is a recommended step, and it seems like a good idea to have a firewall set up.
First, run this to make sure you are using OpenSSH:
First, run this to make sure you are using OpenSSH:
Then run this command to allow OpenSSH (so that you don't lock yourself out of your own server! hehe)
ufw allow OpenSSH
The call enable to turn the firewall on and say "y" to the prompt.
ufw enable
Login As New User
Type "exit" into the server shell to disconnect and go back to the original local terminal shell you were using before you ssh'd into the server. If you hit the up arrow key, you should see the command you used to ssh in. Now, change this to the new user name and try to connect.
If you see the prompt saying ubuntu@crontastic... you're in! ? ?
Getting the Code
By default when logging in as ubuntu you will be in the server directory /home/ubuntu/. I like to create a folder here for all of my "git clones", the raw source code that will be running for all the cron jobs.
mkdir Git-Projects
On this version of ubuntu I already had a recent version of git installed, so I didn't need to change anything here.
git --version
Before, we try to clone our project in the Git-Projects folder though, let's check check our ssh-keys for this user:
ssh-add -l
When I do this for the first time I get the error, "Could not open a connection to your authentication agent."
Aha, we first need to "wake up" the ssh agent:
eval $(ssh-agent)
We're getting closer, but now when I rerun the shh-add command with the -l flag I get an sad message that, "The agent has no identities."
In this case, let's call ssh-add with out authorized keys file.
In this case, let's call ssh-add with out authorized keys file.
shh-add /home/ubuntu/.ssh/crontastic_gh
Note: You will probably need to run these commands to wake up the ssh-agent and re-add your key each time you login to your server after a while!
Now, let's clone the project (make sure to use the SSH url provided by the "clone or download" button on Github and not the HTTPS one).
Now, let's clone the project (make sure to use the SSH url provided by the "clone or download" button on Github and not the HTTPS one).
git clone [email protected]:JimLynchCodes/Ameritrader-Bots.git
Now you should have the code checked out on your server! ? ?
Automatically Adding the Key to Your Keychain On Session Login (And Automatically Revoking It On Logout)
I found this great little snippet from this stack overflow answer. I like to add this to the bottom of my .bashrc file:
new snippet:
# Re-Add shh agent
agentpid=$(ps -ef | grep -P [s]sh-agent | awk '{print $2}')
if [[ $agentpid ]]; then
        export SSH_AGENT_PID=$agentpid
        sock=$(ls -1 /tmp/ssh-*/agent.* | head -1)
        export SSH_AUTH_SOCK=$sock
else
        eval $(ssh-agent -s)
        ssh-add ~/.ssh/crontastic_gh &> /dev/null
fi
With that snippet in the .profile, each time I login I will be immediately prompted for the passphrase, and after typing it in the key will be added to my keychain (to keep things as secure as possibly it's recommended to use a passphrase). Without this command, I'd have to manually run the "eval" and "ssh-add" commands again every time I ssh into the server.
Next, we'll install things that our code needs to run. Since this tutorial is about setting up your server to run NodeJS scripts as cron jobs, we'll install node and nvm so that we can easily run any projects in their desired node version.
To check if you have these tools installed, run them with the -v flag:
node -v
npm -v
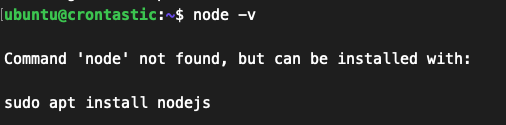
My ubuntu version says that cannot cannot be found but that it can be installed with apt.
However, after naively taking the advice of this output I run the command and get the error that apt was, "Unable to locate package nodejs".
The issue was that I needed to update apt first:
However, after naively taking the advice of this output I run the command and get the error that apt was, "Unable to locate package nodejs".
The issue was that I needed to update apt first:
sudo apt update
And then I could install nodejs with apt
sudo apt install nodejs
Say "y" to the prompt asking if you would like to install the other packages necessary for nodejs.
Next, let's get npm with apt as well:
sudo apt install npm
And finally, let's get nvm so we can easily switch between node versions:
This is a little bit trickier than installing with apt (don't ask me why the creators never published it to apt. Feel free to upvote my issue here about it ?).
curl -o- https://raw.githubusercontent.com/nvm-sh/nvm/v0.35.3/install.sh | bash
Note that this adds things to your .bashrc file, but it doesn't actually source the file again which is necessary in order to actually use nvm. To me, the easiest way to re-source it is to just run the "exit" command and then ssh into your server again.
exit
Once you're in again, you should be able to run nvm commands (don't ask me why they haven't added the -v flag. Feel free to upvote the issue I created here about it).
nvm --version
If this works, then horray- you've successfully installed node, npm, and nvm! ? ?
Testing The Cron Scripts On The Server
Now let's go into the project we downloaded from git and navigate into one of our project folders.
This should have a .nvmrc file so that we can easily switch to the proper version with nvm's use command:
nvm use
When you come across versions of nodejs that you haven't yet installed in nvm, you'll need to run the nvm install command passing the new version as an argument.
nvm i v13.13.0
Once you've switched to the proper node version, you're ready to install the project's dependencies into a node_modules folder. There should be a package.json in the root directory of the project along with the .nvmrc file, so in this folder run the npm install command.
npm i
I usually like to give the script a test run locally, but beware of the side effects of a successful run (for example, saving extra info to a database or pinging people with a notification script). It's also a good idea to run the automated tests in the project to make sure everything's all good. Check the README.md file in the project for instructions on which command to run when the project is deployed. Sometimes it's just the cool old npm start.
Keep this command handy though because in the next section we'll set up this command to be run periodically on a cron schedule!
Scheduling the Cron Jobs
crontab -l
no crontab for ubuntu
crontab -e
no crontab for ubuntu - using an empty one
Select an editor. To change later, run 'select-editor'.
1. /bin/nano <---- easiest
2. /usr/bin/vim.basic
3. /usr/bin/vim.tiny
4. /bin/ed
Choose 1-4 [1]:
Select an editor. To change later, run 'select-editor'.
1. /bin/nano <---- easiest
2. /usr/bin/vim.basic
3. /usr/bin/vim.tiny
4. /bin/ed
Choose 1-4 [1]:
At this point the ubuntu server asked me which text editor I would like to use. Personally, I like to use vim so I chose option 2 here.
This will then throw you into the editor with your crontab file open.
When you save and exit the crontab file (:wq if you are using vim) then you should be sent back to your shell with an output message, "crontab: installing new crontab". This means that your new commands have been scheduled successfully! ? ?
BTW - crontab.guru is a great little webapp tool for getting your cron expressions just right.
Staying Organized With Your Logs
Similarly to how I like to have the folder for git projects be /home/ubuntu/Git-Projects, I like to have a folder for logs at /home/ubuntu/Logs.
mkdir /home/ubuntu/Logs
Then I like to create a folder inside "Logs" for each of the projects inside of my "Git-Projects", giving it the exact same name. This way you can easily find which logs correspond to which git projects while keeping the logs very much separate from the version controlled source code.
Note- If you don't want the logs so "far away" from the source code, you could also create the Logs folder right there in the project's root directory and add it to the .gitignore file.
Fixing Some Node Permissions Issues
Now, when I first checked the logs of the cron script I was seeing "permission denied" errors. I order to fix this I needed to see where node was installed.
which node
This printed out a path, and I ran ls with the -al flag to see what permissions these files had:
ls -al /home/ubuntu/.nvm/versions/node/v12.16.1/bin/
Then I changed the permissions of node using chmod with 777.
chmod 777 /home/ubuntu/.nvm/versions/node/v12.16.1/bin/node
Fixing NVM Permissions Issues
Cron will run our scripts with the default version on node so we will need to run "nvm use" each time our script is executed. This means that we need to use change the permissions for nvm so that our ubuntu user can access it. Unfortunately, "which nvm" won't work since nvm is technically not an executable, but the default place for nvm is in a ".nvm" folder in the user's root directory.
ls -al /home/ubuntu/.nvm/
We are looking for an nvm.sh file as this is the file whose permissions need to be changed. Assuming the nvm.sh file is in this directory, we can then give it 777 permissions like we did with node:
chmod 777 /home/ubuntu/.nvm/nvm.sh
Updating the Date And Timezone
The server time will probably be set to UTC time by default, so we'll need to change this in order to have our cron jobs kick off at the correct times. On ubuntu, the current timezone can be checked with the "date" command.
date
To actually change the server's timezone we can use the timedatectl command. We can use the list-timezones command to see what the valid timezone options are. Since I'm in New York, I'll look for a timezone with "New_York" in the name:
timedatectl list-timezones | grep New_York
For me, this outputs, "America/New_York" so I'll pass that as the argument to the set-timezone command.
timedatectl set-timezone America/New_York
Now Set It Loose
Phew! That was quite a lot of setup just to get a little little server ready to run some cron jobs! Once you get things going though you really shouldn't need to be setting up linux servers like this too often (if you do, you might want to consider some dev-ops type automation scripts like chef or ansible).
And of course you can always come back and use this post as a reference. ?
Happy coding!
And of course you can always come back and use this post as a reference. ?
Happy coding!


 RSS Feed