After building a little NativeScript app with the iOS simulator and a real iPhone test device I was really struggling to get it running on an Android simulator. It kept complaining that my Java version wasn't right, then that the "Android SDK is not installed or is not configured properly"...
The tldr; is basically I need to set some environment variables in my ~/.bash_profile file and then set up a few emulators.
The tldr; is basically I need to set some environment variables in my ~/.bash_profile file and then set up a few emulators.
Overcoming My Blockers
When I first start running the command "ns run android" and was having issues, the NativeScript compiler would keep throwing an error that, "the android sdk was not installed or configured properly"."WARNING: The Android SDK is not installed or is not configured properly"
WARNING: The Android SDK is not installed or is not configured properly
The issue seems to have been caused by me having multiple different android installations in different places. The NativeScript cli kept recognizing the "wrong one" and was trying to use that while something else wanted it to use the right one... something like that. ?
Anyway, if you are experiencing this issue make sure your environment variables are set correctly via your .bash_profile (and not being overridden later).
The in-depth guide below should help you to get things working!
Also shoutout to Igor for patiently helped me figure this out and for writing this nice setup guide!
Installing Java 8
You need the right version of java8.
Personally, I like using brew because it makes this setup a quick one-liner terminal command:
Personally, I like using brew because it makes this setup a quick one-liner terminal command:
brew install --cask adoptopenjdk/openjdk/adoptopenjdk8
Installing Android Studio
Android studio comes packaged with the sdk (well it will ask if you want to install it at which point you can say "yes" and the whole installation process is quick and easy).
Official Android Studio download page
Note: Although I love Jetbrains and all their IntelliJ-esque products, I mostly use VS Code for nativescript development because it's just typescript, html, and css!
Official Android Studio download page
Note: Although I love Jetbrains and all their IntelliJ-esque products, I mostly use VS Code for nativescript development because it's just typescript, html, and css!
Setting Your Path Variables
These are the key ones I needed to add manually to get it working on my machine:
export JAVA_HOME=/Library/Java/JavaVirtualMachines/adoptopenjdk-8.jdk/Contents/Home
export ANDROID_SDK_ROOT=~/Library/Android/sdk
export ANDROID_HOME=~/Library/Android/sdk

export PATH=$PATH:$ANDROID_HOME/platform-tools
export PATH=$PATH:$ANDROID_HOME/tools
export PATH=$PATH:$ANDROID_HOME/tools/bin
export PATH=$PATH:$ANDROID_HOME/emulator
I like to put these lines up here at the bottom of my ~/.bash_profile file.
Note: Don't forget to source your .bash_profile (or open a new terminal window) after making changes and saving the file!
Note: Don't forget to source your .bash_profile (or open a new terminal window) after making changes and saving the file!
source ~/.bash_profile
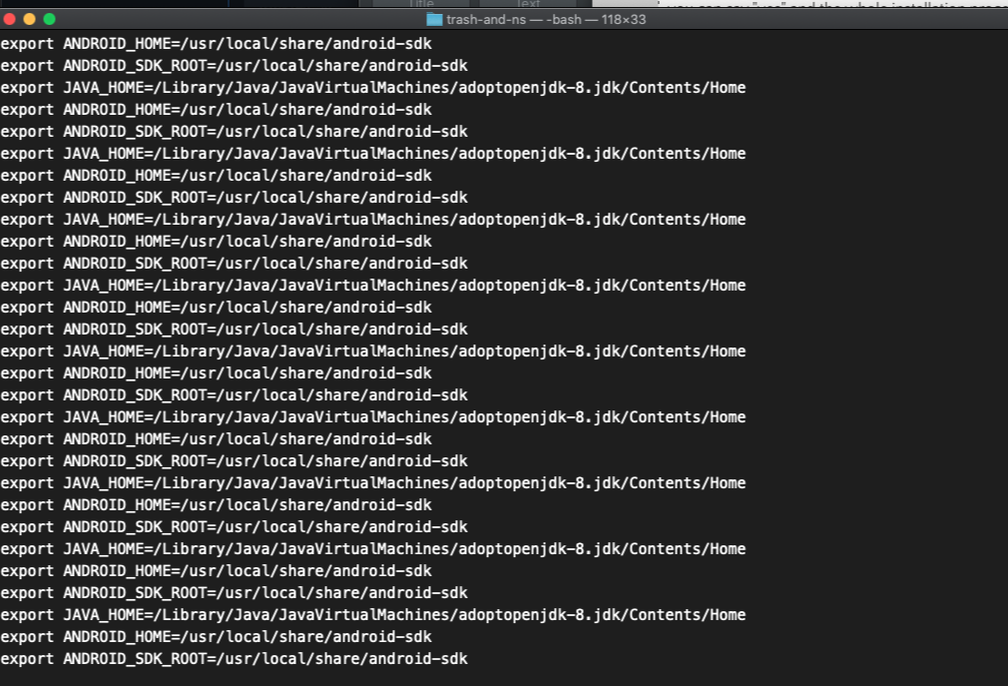
Note: the nativescript cli may continuously write the wrong path in your .bash_profile... lol.
If this is happening to you the things you are trying at the bottom of the file. Then when you find something that works go in and delete early lines setting that same variable since the last one is overriding all the others anyway.
NodeJS / NativeScript / Spike Project Setup
The NativeScript cli makes scaffolding a new project a breeze, and it has some yeoman-style options which allow you to choose your favorite front-end framework and optionally get mobile-friendly sidebar navigation right out of the box!
Let's make a new folder for this spike project:
Let's make a new folder for this spike project:
mkdir android-ns-foobar-testing-123
cd android-ns-foobar-testing-123
NativeScript needs a relatively new version of node to work right.
I like to use nvm to manage my current node version. This makes it really easy and straightforward to get the latest version installed and allows you to use different versions in different projects / terminal windows...
So, suppose we want to use the latest "lts" version of node 14. We can install the latest with nvm like this:
nvm i v14
Installing should switch to the new version automatically, but say you open a new terminal window and want that one to use the new 14.X.X version you just installed:
nvm use v14
Now that we're using a recent version of node, we just need to have the nativescript cli installed.
npm i -g nativescript
This provides a command line tool "ns" (or optionally tns). You can just type ns in the terminal within any folder to check if you have the cli tool installed:
ns
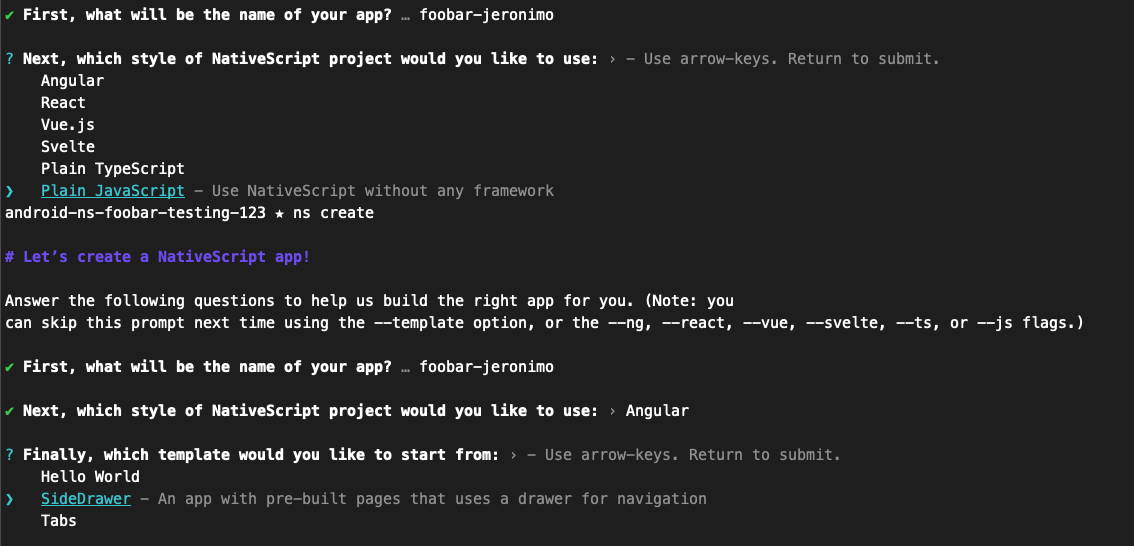
Scaffolding a New NativeScript Project
You can scaffold a new project with the nativescript cli with the create comamnd:
ns create
This brings up a nice little interactive prompt where you can choose your pick of Angular, React, Vue, Svelt, Plain TypeScript, or Plain JavaScript! Wow!! ?

Then for each framework you'd like to use, you can choose whether you want it to scaffold out a NativeScript codebase for a blank vanilla app, one with sidebar navigation already implemented, or one with the bottom tab navigation! Awesome!
We have a NativeScript project, woohoo!! ?
Is it too soon to buy NativeScript hoodies...? ?
Is it too soon to buy NativeScript hoodies...? ?
Setting Up Android Emulator(s)
Ok, so at this point we have the nativescript cli ready to run and we're in our project.
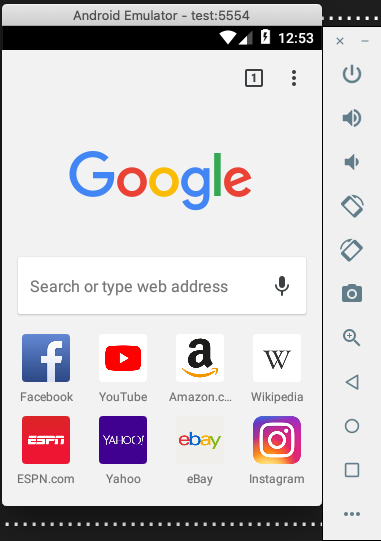
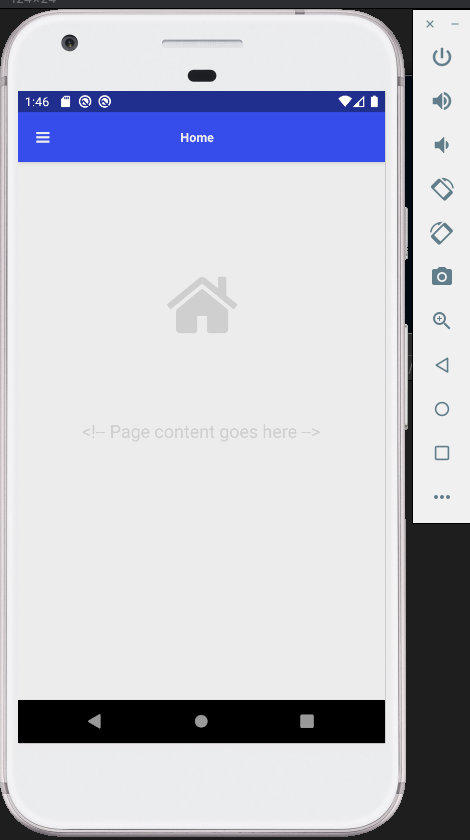
However, we're not quite ready to run it and start developing yet because the compiler will likely just shrug and say, "well I don't have any android emulators to use".
Either that or will popup some very basic, potentially weird proportions default emulator:
However, we're not quite ready to run it and start developing yet because the compiler will likely just shrug and say, "well I don't have any android emulators to use".
Either that or will popup some very basic, potentially weird proportions default emulator:
I like to set up emulators by just going through the wizard pages in Android studio.
NOTE: Each emulator is set to use a specific version, and you need to create the emulators for an android version that your current android project supports!
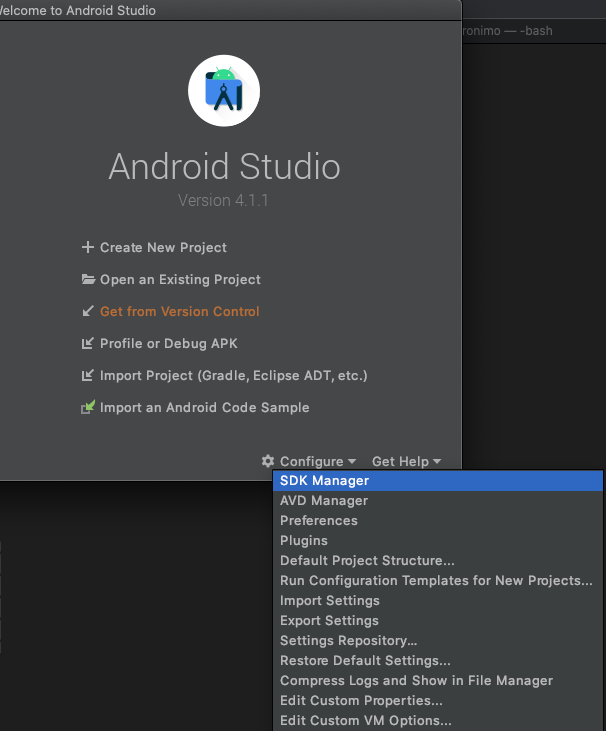
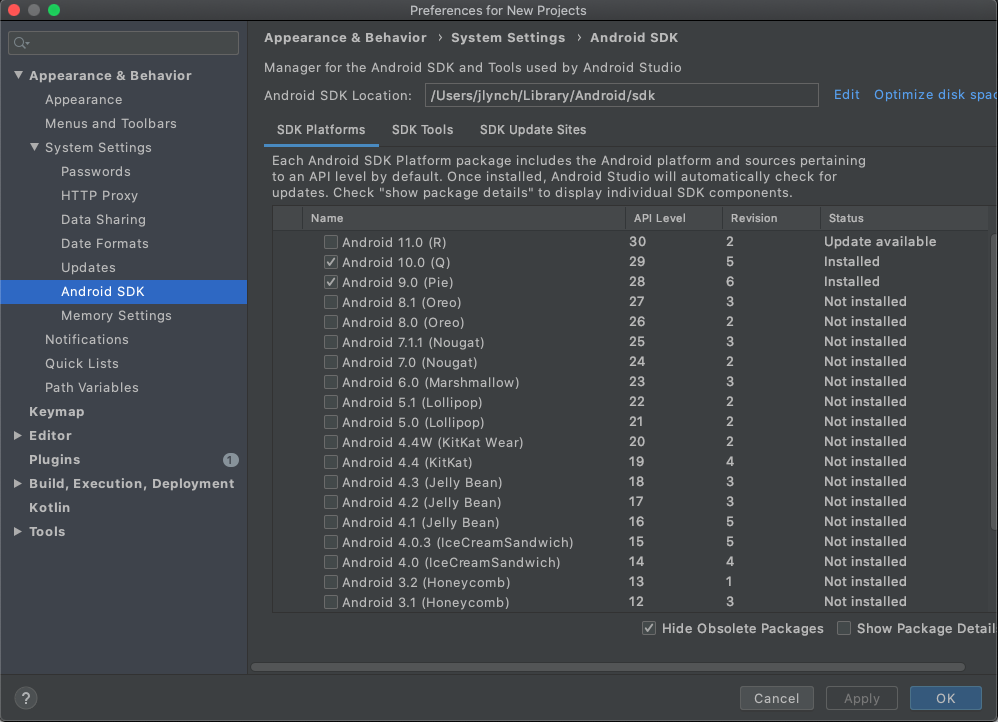
You can view your current android sdk versions by opening up Android Studio and clicking Configure -> SDK Manager.
NOTE: Each emulator is set to use a specific version, and you need to create the emulators for an android version that your current android project supports!
You can view your current android sdk versions by opening up Android Studio and clicking Configure -> SDK Manager.
This will take you to the sdk manager page. You can see that on my machine I currently have android sdk versions 28 and 29 installed.
Note: you could also use this somewhat hackish command which uses the android tools "avdmanager" to see what targets we have available to use:
${ANDROID_HOME}/tools/bin/avdmanager list
Ok, so now that I know I want to use android API version 29, it's time to make some emulators!
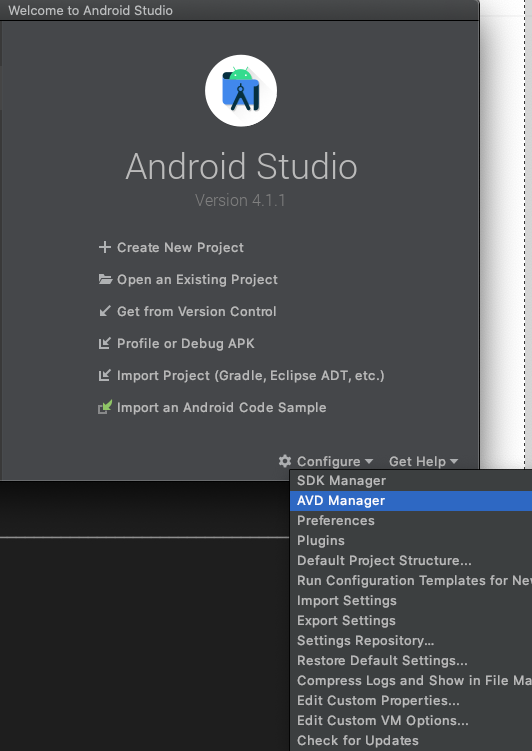
Let's go back to that popup that appears when you first open Android Studio and click on Configure -> AVD Manager.
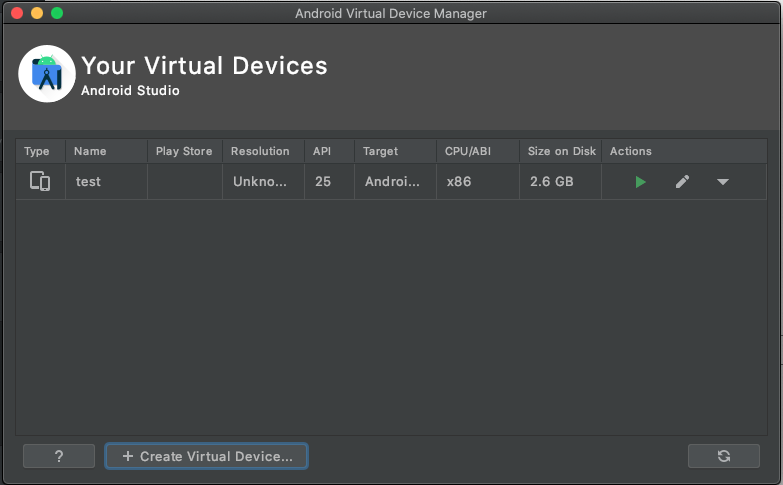
This should take you to a little "Virtual Devices" screen. Click the Create Virtual Device... at the bottom to get started creating a new device emulator.
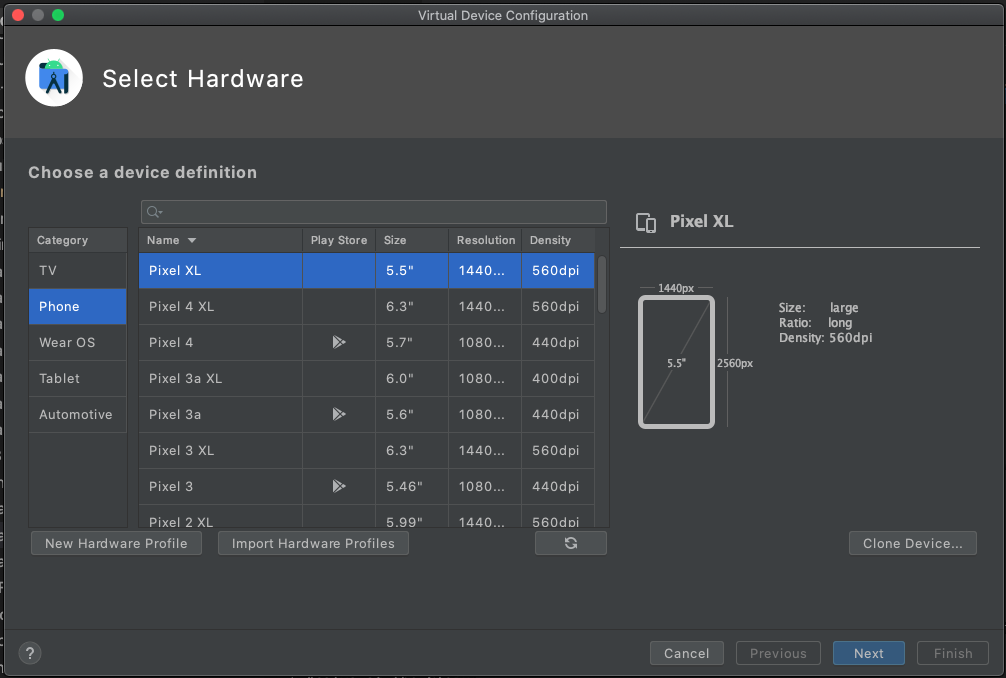
For this example I'm going to create an emulator for two devices: the Pixel XL and Pixel 4.
I really just selected the device from the "Select Hardware" list and ran through the rest of the pages hitting "Next" and just going with the default configurations.
For this example I'm going to create an emulator for two devices: the Pixel XL and Pixel 4.
I really just selected the device from the "Select Hardware" list and ran through the rest of the pages hitting "Next" and just going with the default configurations.
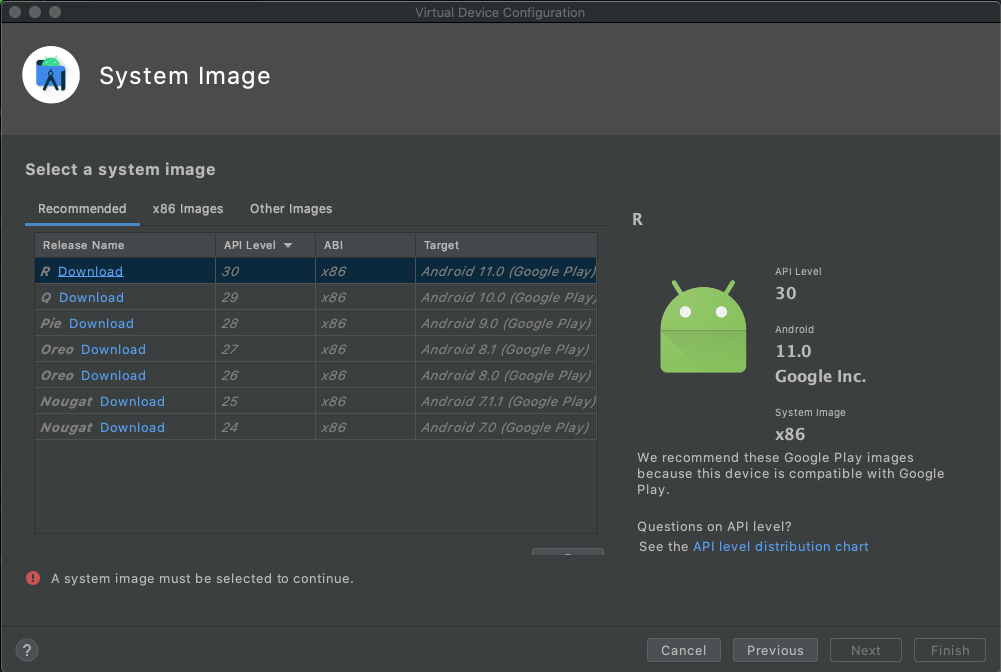
There was a "System Image" page though where I couldn't just hit "Next"- it wanted me to select a system image!
Remember from an earlier step the latest android sdk I had is for the v29 API. So, I this popup below I downloaded the second option, "Q" release that uses android 29.
Remember from an earlier step the latest android sdk I had is for the v29 API. So, I this popup below I downloaded the second option, "Q" release that uses android 29.
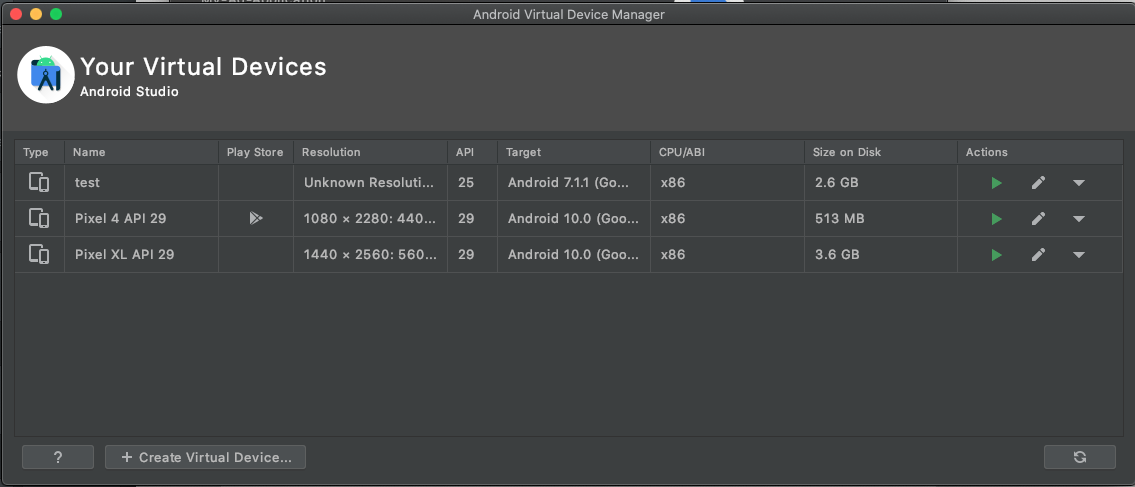
After setting up your emulators you should see them in the Android Studio AVD Manager screen:
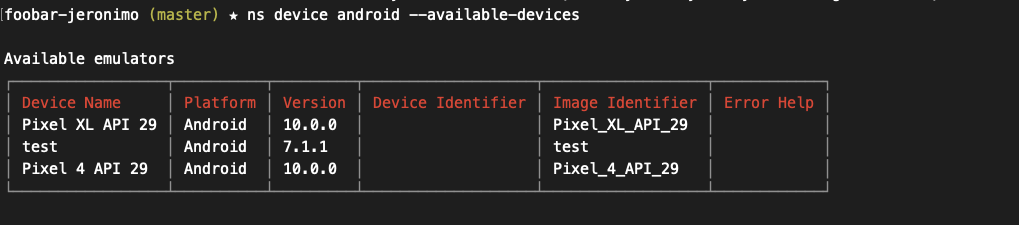
This handy ns cli command will show you available android emulators:
ns device android --available-devices
If you've set up your emulators with the proper API and targets that you're using in your NativeScript project then you should see the new devices output in the table printed to the console:
If you see the emulators here then you're good to go. Let's run the project!!
Running The Project On An Emulator
To run the project on an android emulator, use the cli "run" command, specifying that you want to run it on android:
ns run android
Notice how the table from a previous step that showed all of our available emulators had a column named Image Identifier.
We can run our project on a specific emulator by passing the --device flag and then providing the Image Identifier for that emulator.
For example, this runs it on our Pixel XL emulator:
We can run our project on a specific emulator by passing the --device flag and then providing the Image Identifier for that emulator.
For example, this runs it on our Pixel XL emulator:
ns run android --device="Pixel_XL_API_29"
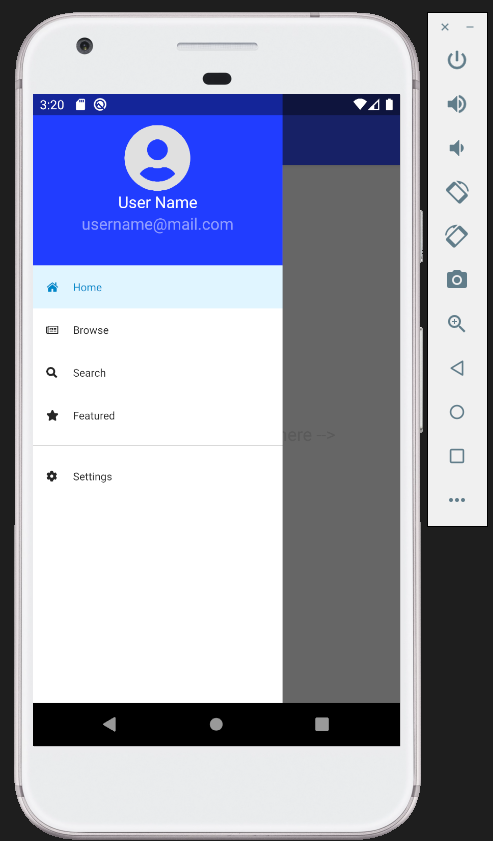
Behold, a glorious NativeScript application running on our Pixel XL emulator!!
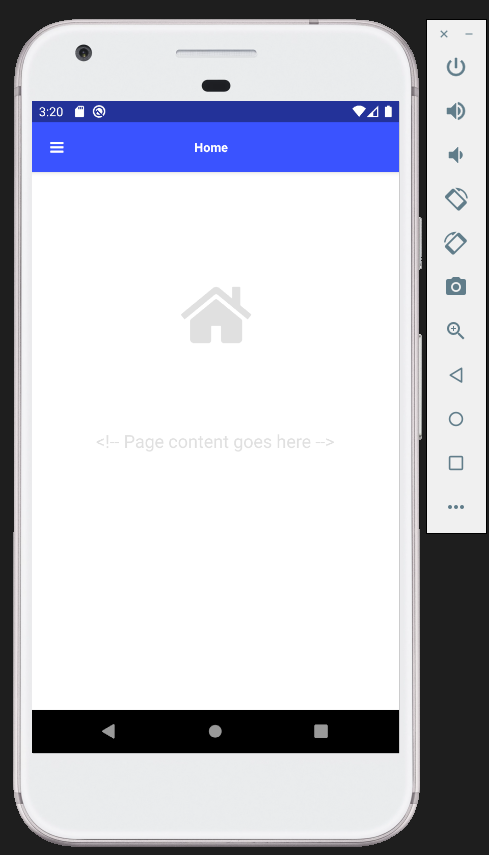
Below is a screenshot of how the nice sidebar navigation looks when open- keep in mind this is all still a completely fresh scaffold, right out of the box code!
And yes, it uses the conventional router for the front-end framework you chose when scaffolding it!
And yes, it uses the conventional router for the front-end framework you chose when scaffolding it!
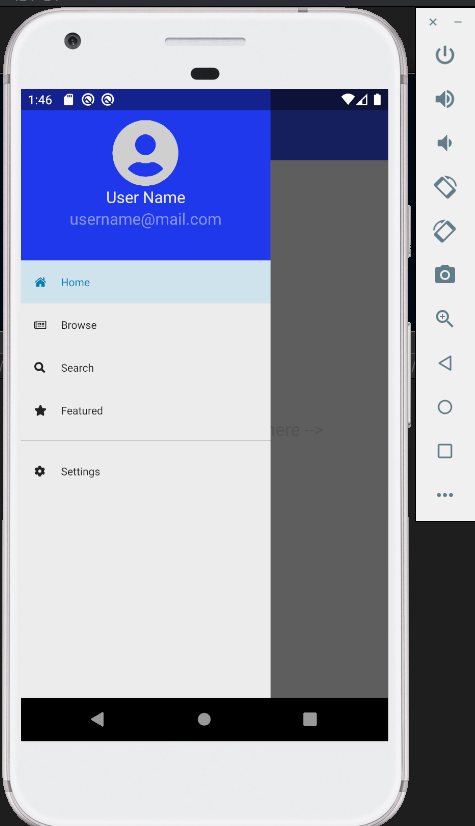
Similarly, this runs it on our Pixel 4 emulator:
ns run android --device="Pixel_4_API_29"
Although this does look very similar to the Pixel XL, they are actually different aspect ratios...
Go Forth And Dev!
Welp, you should be all set up now for developing your NativeScript app on android emulators... now go build an awesome app! ?


 RSS Feed