If I hadn't taken that trip to California and went to the that React Native meetup in Mountain View then I would have no idea what node-red was or that it even existed. I felt kind of stupid being the only guy in the room who had no idea what everyone was talking about, and I'm glad now that I was brave enough to ask for more information about it. Basically, node-red allows you to create fully functional backends that run on NodeJS with an intuitive drag-and-drop interface that will help you both develop your program and deploy it. It doesn't sound like much, and I didn't think much of it at first either. But as I began to play around with it at home more and more, I started to realize how much faster I could build cool things that worked, and how much easier Node-Red can make backend development. In this tutorial I'll explain how to set it up and get a 'Hello World' app running,
Getting Node-Red
It's a bit strange figuring out for the first time exactly how to get to the node-red editor. You can't just go to the website and use it in right there in the browser. Instead, you'll need to install a global package through the command like using npm. This is the install command:
sudo npm install -g node-red
This should prompt you for an administrator password, and once it's installed you can start up a local serving running the node-red IDE through the command line like this:
node-red
In your terminal window you should then see a message similar to this:
[info] Server now running at http://127.0.0.1:1880/
[info] Server now running at http://127.0.0.1:1880/
We can then put this url in the browser to get to the node-red IDE. Then you will see a blank canvas page and a left-side tool-bar with different draggable blocks.
My First Flow
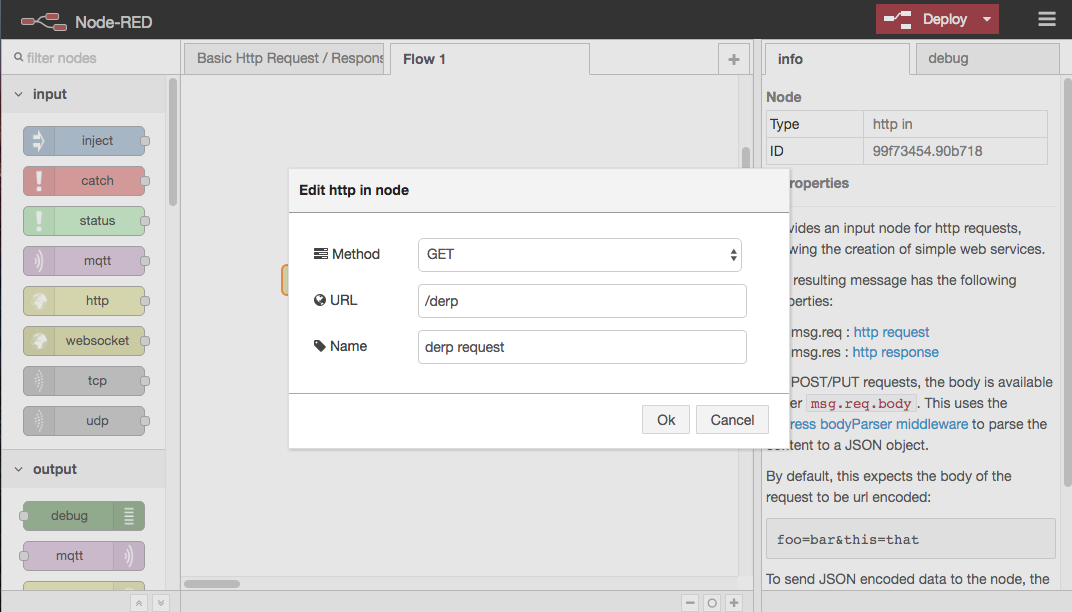
Find the input section and drag out an http request block. Double click on it and fill out the form. The name is just a label for the block so you can remember what the block does. The url property determines the endpoint that will be called to in order to trigger this flow.
No go to the output section an drag out an http response block. You should double click this block and rename is something more descriptive. I'll just call mine derp response for now. Then connect the two blocks by clicking the mouse down on the little grey square in one of the blocks and dragging the mouse cursor to the grey square of the other block. Then release the mouse on the other grey square and a line connecting them should be drawn. This line is basically a NodeJS program cascading from function to function.
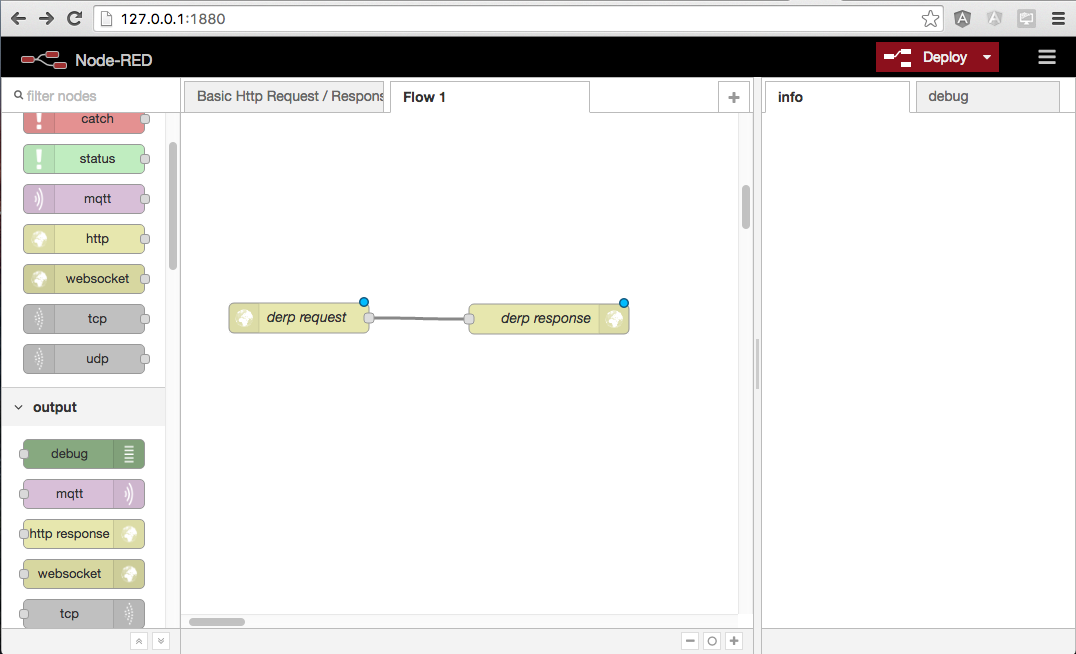
Click the red Deploy button in the upper right corner of the page. Now if we try to hit this url, we can see that it indeed works and returns to us an empty object. Yay!

Logging and Returning Objects
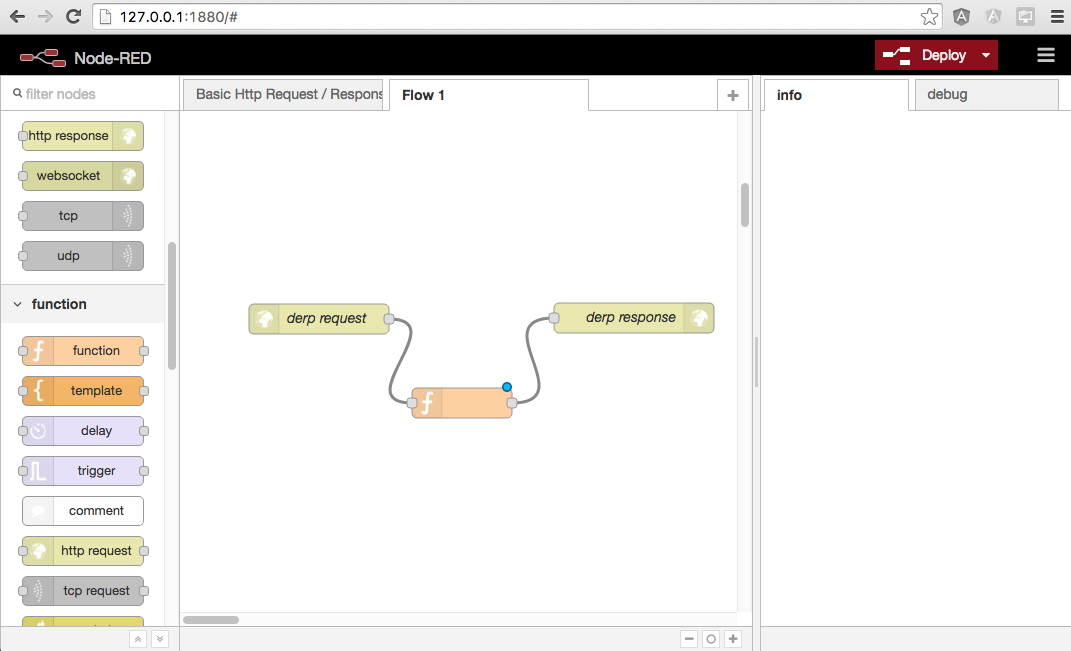
Ok. That was so trivial that we didn't even get a chance to put hello world anywhere. But hey, you're up and running with node-red! And it was super easy, wasn't it? Alright then, let's return an object and log to the console. Under the function section let's drag out a function. Click on the line connecting the response and request blocks and hit the delete or backspace key to remove it. Then connect the end of the incoming request block to the left side of the function and the end of the outgoing response block to the right side of the function.
We can then give this function a name, and then fill it in with a function body. It's important to note that node-red has a built in concept of 'msg.payload'. The variable msg is given to you automatically in every function, and it's payload property contains the data that has been passed along from the previous block. The function must then return a message object who payload contains the data you wish to send. We can also use node.log to log text out to the console.
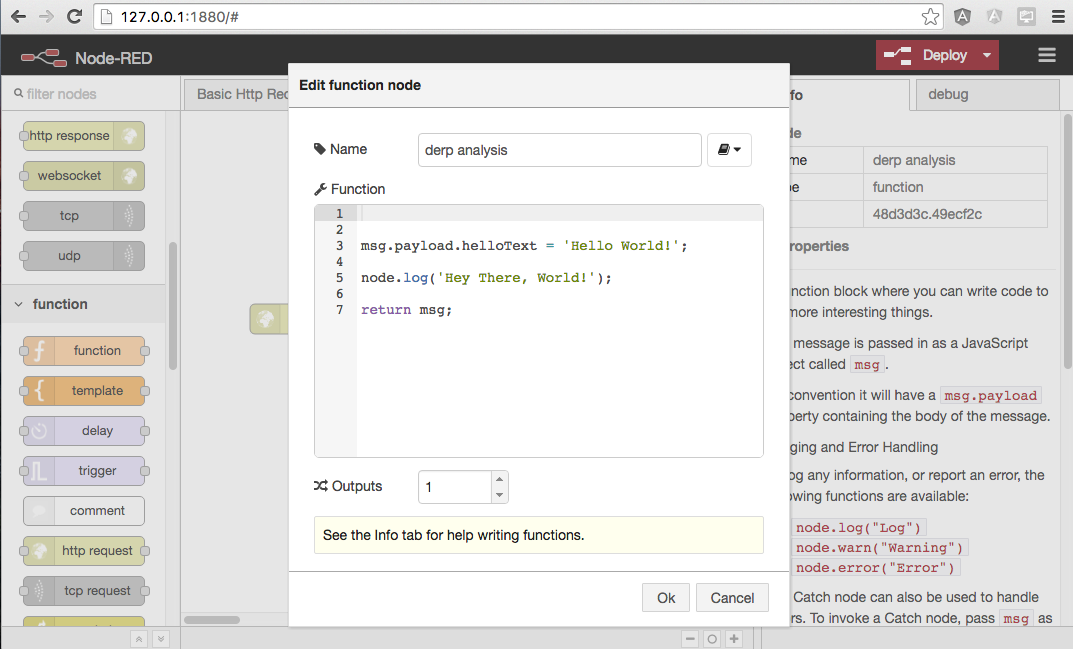
Here's the code I entered in the function body:
msg.payload.helloText = 'Hello World!';

node.log('Hey There, World!');

return msg;
Alright, now let's test it! Click on Deploy, and let's visit our url. You should see a response with a object containing a key called "helloText" with a value of "Hello World". Also, in our command line terminal there should be a log message that says "Hey There, World!".


Sending Request Parameters
You can send a normal query string with any number of parameters and then gain access to them with the same msg.payload syntax. Suppose I wanted to send with my request a name and an age. I could structure the request to look like this:
http://127.0.0.1:1880/derp?name=Jim&age=25
I'll just change our function slightly to log these properties being passed in:
msg.payload.helloText = 'Hello World!';

var name = msg.payload.name;
var age = msg.payload.age;

node.log('The user ' + name + ' has age: ' + age);

return msg;
Now click deploy and hit the endpoint from a new browser tab. You should see the message being logged out correctly in your console. Also notice that the parameters you passed in carried through to the output object that is returned in the response.


Closing Thoughts on Node-Red
With Node-red you can pretty much make any backend service you can think of. Imagine all the complex tasks like logging, saving to databases, emailing certain people, etc. that may need to happen in your production backend. Now think about how clean it would all look if you structure it as a nice node-red flow with different functionality compartmentalized in the different blocks. That can be reality. Node-red is so easy that a child could use, but powerful enough that an expert would would love using it as well. The scary part is that it is so simple and easy to develop it like this, you might never go back to writing server code your usual way again!


 RSS Feed