There are many ways to add external Javascript library dependencies to a project. The really old-fashioned I'm-just-starting-out way of doing it would be to actually go to the website and download a zip of all the files in the library. Then as you start learning more about Javascript you might realize that you can just add a script tag pointing to the CDN location for that library. For example, you could load in Angular and TweenMax by putting this in your html file:
<script src="https://ajax.googleapis.com/ajax/libs/angularjs/1.4.8/angular.min.js"></script>
<script src="http://cdnjs.cloudflare.com/ajax/libs/gsap/1.18.0/TweenMax.min.js"></script>
This is pretty cool. And for a while this way seems like a fine way to be, but then you start wanting to use updated versions of the libraries, and when you start new projects you find yourself googling for each CDN link. Isn't there a better way? Yep, bower.
Before We Begin
Before we start you'll need to have downloaded nodeJS and npm from here: https://nodejs.org/en/download/
You can also check if you have npm already by opening up a shell and running this:
You can also check if you have npm already by opening up a shell and running this:
npm --version
Make a "New Project"
The cool thing about web development is that making a "new project" really just starts out with making a folder. Webstorm will let you run an html file from any folder, so all you need to do is create a folder (You don't have to use WebStorm for this, but I am). I'll call mine Bower-Test-Proj. Now, I'll just create a new index.html file that writes "Hello." on the screen:
index.html
<!DOCTYPE html>
<html lang="en">
<head>
    <meta charset="UTF-8">
    <title></title>
</head>
<body>
Hello.
</body>
</html>
Boot Up That Command Line
Bower is a command line utility so let's head on over to our favorite command line tool such as a unix shell in terminal on Mac OS or cmd on Windows. Let's cd down into the folder that we just created as the "project folder".
cd /Users/JimmyJim/examples/My-Projects/Bower-Test-Proj
Cool. Now you should have npm available. Just to make sure let's check the version:
npm --version
If you get an error from this then you need to go back up to the Before we Begin section and download nodeJS (npm is installed with it).
If it returns a version number, great! You're ready to install bower!!
(ok, it's not really that exciting).
If it returns a version number, great! You're ready to install bower!!
(ok, it's not really that exciting).
npm install bower
Nice! Now we have bower! So... let's do something with it. :) First, we need to make a bower.json file, and then we'll add the dependencies to it (but all this will be super easy to do through the command line now that we have bower).
bower init
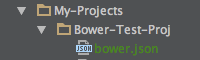
This will start the process to create a bower.json file inside of your project folder. It will ask you a few questions, but since this is just a test you can probably get away with flingy through it hitting the enter key for everything. Once it's finished, you should see a bower.json file in your project folder. Huzzah! This is a great moment. Take a minute to grab a beer if you wish. You deserve it, but there's still more to do!
Note: If yours isn't green, right click and hit Git -> Add to add it to version control!
Go Crazy With "Bower Install _____"
Oh yeah! We have our bower.json file, and now we can easily add dependent libraries with "bower install library" where the word library is swapped out for the particular library you wish to install. Don't forget to tack on the --save flag! This is what actually adds a line for this dependency in the bower.json file. Try any or all of these below:
bower install angular --save
bower install gsap --save
bower install bootstrap --save
bower install react --save
bower install jquery --save
bower install backbone --save
Warning: You might find that this is actually kind of fun when you get the hang of it. If you go overboard (like I did) and end up installing 20 or 30 libraries just for fun, you can always remove them with this:
bower uninstall library --save
Add Script Tags to the Installed Bower Libraries
Now that you've installed the libraries and have added them to the bower.json file, we still need to reference the frameworks in the index.html file. In Webstorm you can just type something like this:
<script src="angular"
Then you can hold the control button, hit the space bar twice, and you should be able to then choose the "angular.min.js" file which will fill in the correct path to the file. For me they looked something like this:
<script type="text/javascript" src="bower_components/angular/angular.js"></script>
<script type="text/javascript" src="bower_components/gsap/src/minified/TweenMax.min.js"></script>
Phew! Now Let's Start Coding!
If you've followed this guide than at this point you should be finished for now with bower and ready to start building your project. That's a quick start to getting up and running with a fresh website / web application with your external javascript libraries managed with the bower command line interface. Once you know what's you're doing, it's actually kind of fun and definitely saves time. You can also use bower to easily install the dependencies in a project you pulled off of Github by cd'ing down into the directory that contains the bower.json and just running this:
bower install --save


 RSS Feed